Journal
Practice & process notes
Occasional writing on my art practice, techniques, process, and the ideas behind the work.
10 articles on studio practice
April 5, 2020
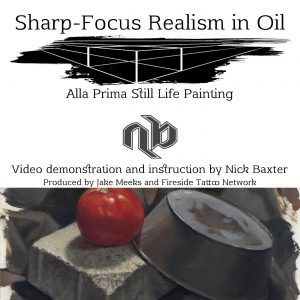
Notes & Advice 12: What To Consider When Setting Up A Still Life
Discussing some of the subtler points of still life setup with Jake Meeks of Fireside Tattoo Network and Podcast. Part of my alla prima still life painting workshop for sale on the fireside website in video module format.
Read →
March 12, 2020
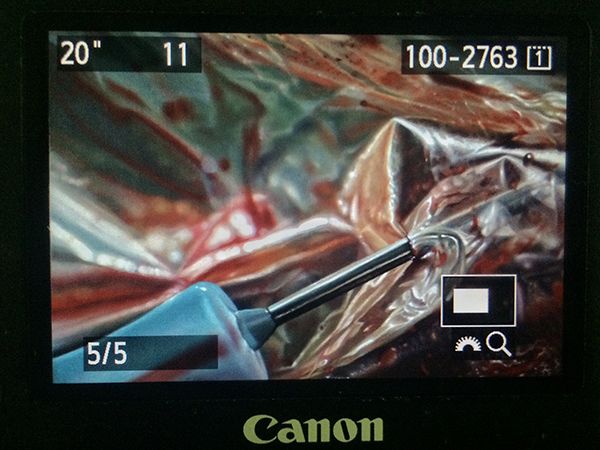
My 20-Step Program for Perfect Art Reproductions
If you’re a painter or visual artist working in any traditional media, capturing digital images of your work is practically a requirement nowadays, and has been for a while. I don’t know any artist who could survive without getting images of their work onto the internet, submitted to publications, made into prints, or a variety of other applications that require a quality reproduction. And quality is the key word here: representing yourself with a poor version of your work will hurt your chances of success. You wouldn’t think that capturing quality images of a completely still, flat object in a controlled indoor setting would be one of the most challenging photography jobs, but it is. I’ve actually paid pro photographers to shoot images of my paintings, and gotten a disc full of yellow-tinted garbage and flat-out unusable files, because those photographers weren’t well versed in the highly specific nuances of this photography application. (untitled), oil on linen panel, 8 x 10 inches, 2016 The details matter here, and skipping any of the major or sometimes even minor steps will usually compromise the end result, to varying degrees. With so many factors that can go wrong, it’s wise when possible to devote an area of your studio to this, with dedicated lighting, equipment, and pre-measured distances and angles. Depending on the level of compromise or imprecision in your studio setup, the more editing of your raw files you’ll need to do on your computer. But even the best photography results will still require basic cropping and picky stuff like smoothing over a blown pixel from your camera’s sensor, or eliminating a small cat hair that somehow floated and stuck to the painting (cats are thoughtful like that, always trying to help…). So here’s the equipment you’ll need (with what I currently use in parentheses), followed by the process, which was taught to me by the talented and wonderfully kind British painter Edward Povey and his wife Donna Tolar. I’ve added some of my own Adobe Photoshop expertise to their process for correcting photography shortcomings, and that’s included as well, but you’ll need a fairly good understanding of the program to follow my brief notes (or else this would be book length, not blog post length, sorry). Equipment Camera: full-frame sensor DSLR (Canon EOS 5D Mark III) Lens: anything in the 50mm range, without a zoom (Canon EF 50mm 1:1.2 L) Tripod: sturdy, with fully adjustable ball joint mount (Manfrotto 290 and 496RC2) Remote shutter cord (Canon RS-80N3) Circular Polarizer Filter to fit lens (Promaster) 2 adjustable freestanding studio lights with daylight balanced bulbs 2 Polarizer filters for the studio lights (Visual Pursuits Glare-Stop 8M Filter) Easel or flat wall space for mounting artwork 90º perpendicular to floor. Tape measure and/or ruler Level (the straight/flat tool with the little air bubble vials) White, neutral gray, or black sheet or walls Enclosed, light-proof studio space (for best results, it should be on par with a film processing darkroom, or shoot at night with all curtains/blinds drawn) Computer (Imac, 4.2 GHz Intel Core i7, Radeon Pro 580 8 GB) Photoshop CS4 or newer (CC 2019) Process Set up photo area with everything at right angles where necessary, and parallel where necessary. 90º angles and parallel planes are crucial for minimizing lens distortion. Your artwork needs to be perpendicular to the floor, as does your camera lens. The front glass edge of the lens needs to be parallel to the artwork. Use your level to check artwork angle and other things, and use the level sensor on your camera to make sure it is both vertically and horizontally balanced, and pointed precisely to the exact center of the painting. Use a tape measure to calculate any measurements needed or to check straight alignments. Set up 2 studio lights at 45º angles to your artwork, halfway between your camera and the artwork. Each light should point towards the opposite vertical edge of the artwork, at the halfway point of the artwork’s vertical measurement. Set up a black, gray, or white sheet behind your artwork, if your studio wall isn’t already white, gray, or black. The background that your camera sees around the artwork will influence how it processes color and adjusts its white balance. For really dark artworks, I like a black background, and for really light ones, a white background. Attach polarizing filters to the front of each studio light, as flush as possible to the light hood without touching the bulb (which could melt the filter gel). I rigged my own attachment system for the lights I have out of wire and masking tape. Adjust camera speed to 100 ISO, and match its white balance to the type of bulbs you’re using in your studio lights (if tungsten, choose tungsten setting, etc) Set image quality to the highest setting (camera RAW) Set lens to whatever its midpoint aperture is, usually F8-11 for your typical F16 or F22 capable lens. Attach remote switch, and use screen view instead of eyepiece viewing so that you don’t risk bumping or shaking your camera. With all overhead and ambient lights off, and only the two filtered 45º angle studio lights on, spin the circular polarizer filter on your lens until all glare highlights on the artwork disappear (when viewed through the camera lens). If some glare or highlights remain, you may need to rotate the 2 filters on the lights a bit. There should be no other light entering the room or hitting the artwork. Focus the lens as tightly as you can on the artwork. Adjust camera shutter speed according to these final calibrations. For me it’s usually in the 20-30 seconds range. With such a long exposure there can be absolutely no movement or shaking of the artwork, the camera setup, the floor, or the room you’re in, or else you’ll get a slightly blurry or hazy image. Bracket your shot, meaning find what appears to be the most accurate shutter speed as indicated by the camera sensor, then also shoot one or two speeds slower and faster than that, just to ensure you have the proper exposure. Cameras can be fooled by paintings with a high degree of contrast between their lightest light areas and darkest dark areas. You can use the compensation settings on your camera to help with this as well. On your computer, make sure your monitor is calibrated and you’re working with the proper display brightness. Make sure the lighting in your computer area is balanced daylight bulbs or natural daylight from windows. Place the artwork next to or near the computer monitor, in the same balanced/neutral lighting. Open your raw files in Photoshop and select the most accurate exposure by comparing to the original artwork. Edit as needed to crop, straighten, or correct lens distortion. Just about all lenses will distort or warp the picture plane as it gets closer to the edges of the lens’s viewing area. If your artwork is a perfect rectangle but is no longer geometrically perfect in the photo, drag horizontal and vertical guidelines onto the image and use EDIT > TRANSFORM > DISTORT and/or WARP functions to correct the artwork’s shape. Edit any inaccuracies in color with adjustment layers and layer masks as needed, comparing against the actual artwork next to your hopefully decently calibrated monitor, in the same balanced lighting. The most effective adjustment layers for these minor tweaks are HUE/SATURATION, COLOR BALANCE, LEVELS, and SELECTIVE COLOR. Since my studio setups at the various places I’ve lived over the years have almost never been ideal, I usually need a combination of all of these adjustment layers on every image to get it 95-100% accurate. In rare cases I’ve used multiple of each, with parts of each erased in order to let parts of the other layers show, to match what was happening in each area of the painting. As noted above, these last 2 steps can get very technical and require a good working knowledge of Photoshop, which can be gained by tutorials or books of course, or simply from hours of controlled experimenting on a sample image. Edit any blown pixels, dust, hairs, or other minor imperfections with CLONE STAMP tool. If you plan to turn the digital file into a physical print, you’ll likely have a second round of color editing to do on the file, once you see a proof from whatever printer you’re using. Printer ink on paper is a much different process and effect than a backlit digital screen, and every print format is a little bit different in how it needs to be prepped. Wow, being a professional artist is a lot of work. This isn’t really a step, I just wanted an even 20 steps because it looks better and makes me feel good. So that’s it! Just a really quick and simple process (just kidding) for getting guaranteed amazing, coffee table book, professional-ass website, or giclee print quality artwork reproductions every time. Enjoy!
Read →
January 2, 2016
Miniature Landscapes
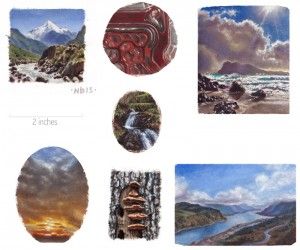
This past month I unearthed a bunch of tiny frames from my studio storage for the purpose of painting little gifts for friends and family this holiday season. I’d been collecting these things at various vintage stores and yard sales for the past several years for just such an occasion. Looking to tap into the peace and simplicity of painting outdoors during this colder (mostly) indoors season, I decided to attempt some miniature landscapes for these frames. Various miniatures, oil on canvas paper, 2015 For the first time since embarking on my landscape painting journey about a year ago, I worked from photos rather than “en plein air.” Although unable to immerse myself in the atmosphere and unique light properties of the setting, I found the photos an incredibly effective practice modality due to the minimum of mental conversion needed in the controlled studio environment. The unchanging two-dimensional photo and the optimal lighting conditions were a great way to narrow down the variables in the artistic equation, freeing up my memory to attempt to rekindle some of the original vibe of these landscape locations, as well as focus on fundamentals like color matching and painting technique. I imagine this being somewhat similar to what the Hudson River School masters experienced in their studios, working strictly from memory and their plein air field studies. Miraflores Beach at Night, oil on linen panel, 4 x 6 inches, 2015 Full Moon Sunset Over East Austin, oil on linen panel, 4 x 6 inches (oval), 2015 Each of these tiny paintings were completed with the alla-prima technique over the course of a single 2-3 hour session, including the lone non-landscape study of the inside of an apheresis blood cassette (random, I know…more on this in the coming months, hopefully…), which was a gift for my phlebotomist friend.
Read →
June 5, 2014
Daily Rituals & Creative Routines
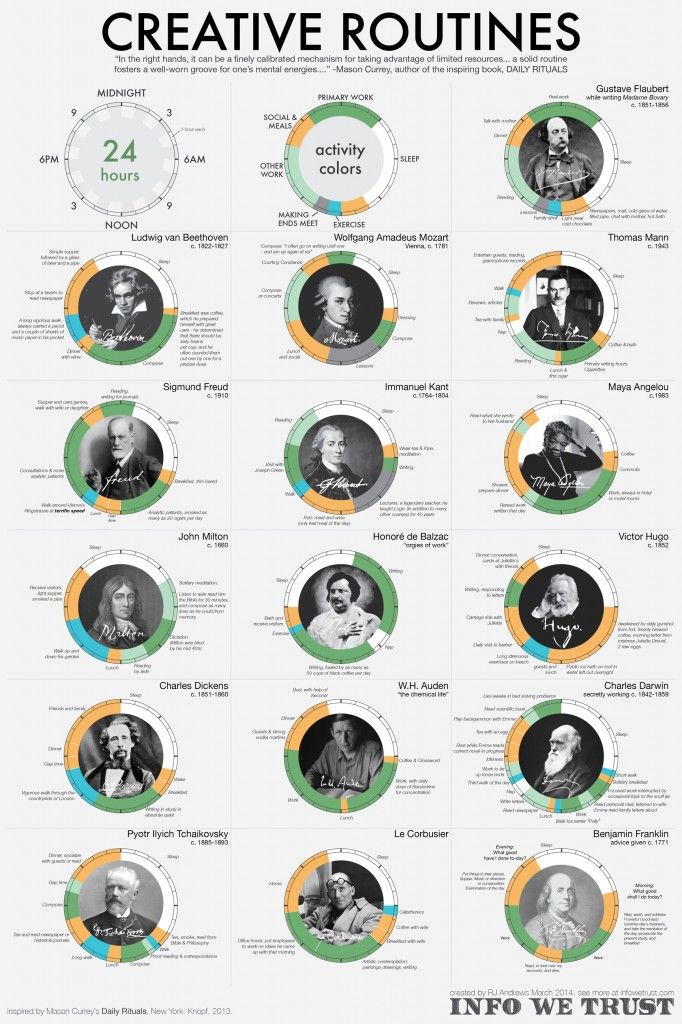
This year I’ve been picking my way through the book Daily Rituals: How Artists Work in little bits and pieces and being thoroughly entertained by the habits and daily minutiae of some of recent history’s greatest thinkers and creators. I can’t recommend this book enough to any alienated, existential-crisis-prone artist in order to be reassured that: You’re not crazy You’re crazy Here’s a fun infographic that some cool person made to give you a brief glimpse into some of the inspiring and/or wacky daily lives of some of the greats.
Read →
May 20, 2013
Transfiguration: Process
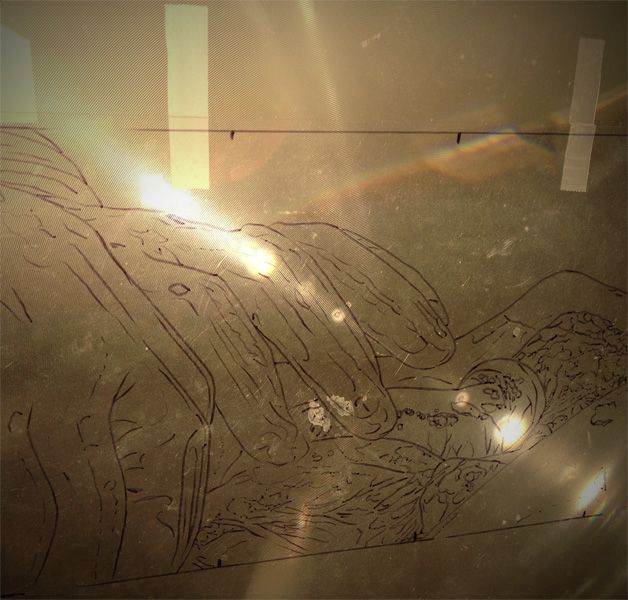
Here are some studio and process shots from the few months’ timespan of painting my latest large work in the Apostasy series: Tracing, on the projector and ready to begin. Starting the block-in of color, working from a small reference. Optical illusion: new painting in front of recent finished piece Glorification. Hands like spiders everywhere. Wound progression. Adding the final translucent white glaze to the gloves for that milky latex look. Applying the final shadow glaze. Working on the finishing touches… From projection tracing to completed painting.
Read →
December 31, 2012
Glorification
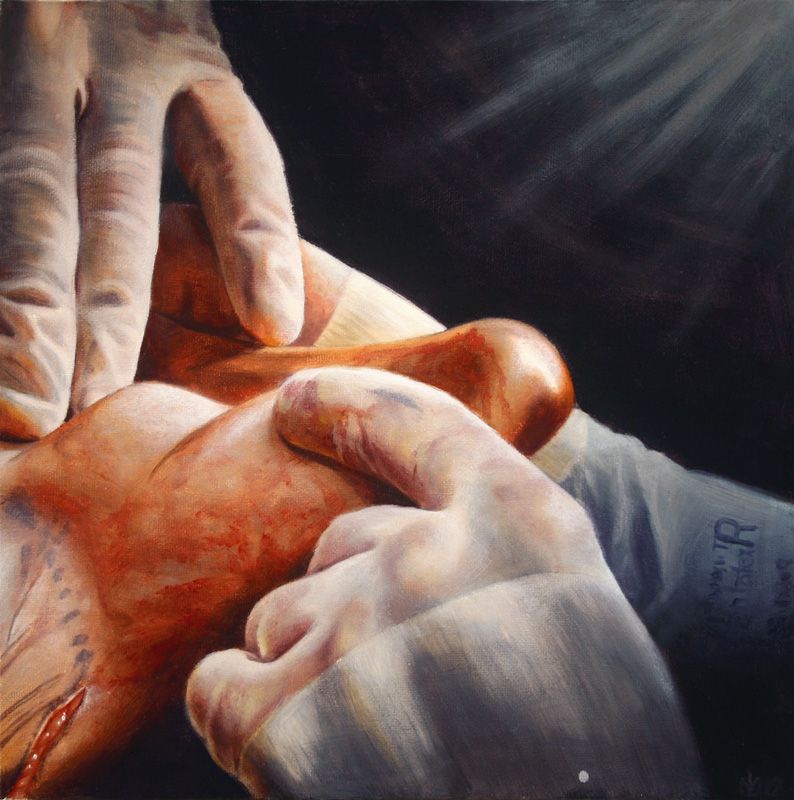
My latest installment in The Apostasy series, and the last for 2012, is now complete. Four times as big as the next smallest piece in the series, and by far the largest painting I’ve attempted in oil at 48 inches square, this was a grueling endeavor. Quite frankly, I’m just relieved it’s over, but on the positive side, I feel much more prepared and able to take on the next (and second to last!) piece in the series, which will be in the same large size range. Here is a visual walk through the process of making this painting, which for now I’ve tentatively titled Glorification: Glorification (study), oil on canvas board, 12in x 12in, 2012 Glorification, oil on panel, 48in x 48in, 2012 Happy new year everyone! May we all enjoy success in our continuing endeavors, and a progression in awareness, happiness, and health from an individual level to a global scale.
Read →
September 3, 2012
Notes & Advice 1: Stepping Back
Words of wisdom, from the astoundingly skilled, 26-year-old, San Fransisco-based painter Hsin-Yao Tseng: “It’s important to squint your eyes while studying your subject and to stand back from your painting frequently. Squinting simplifies the details so you can see the big shapes and value patterns of the subject. Also, you get a sense of the lost-and-found edges. Standing back from your painting lets you evaluate the unity of the piece. Seeing the unity prevents you from overworking detailed areas or making unnecessary brushstrokes.” (Seidner, Rosemary Barrett. “Born To Paint.” The Artist’s Magazine. October 2012: 44-51) Great advice for perfectionist, detail-obsessed realism painters. Although aware of this advice long before reading Tseng’s feature this week, I too often forget to practice it. It was a timely reminder, as I was just about to put the finishing touches on a new experimental painting. The more experimental or unfamiliar the territory that an artist is navigating, the more important it is to have his trusty fundamentals and basic skills by his side, like a compass, should he suddenly realize how lost he is. So, Inspired by this painter wise beyond his years, I spent a recent afternoon in the studio focusing on this teaching. Being mindful to step back and gaze loosely at the overall image every 30 minutes or so, I found it a very refreshing practice. Note to self: do more of this.
Read →
July 24, 2012
In The Studio 2
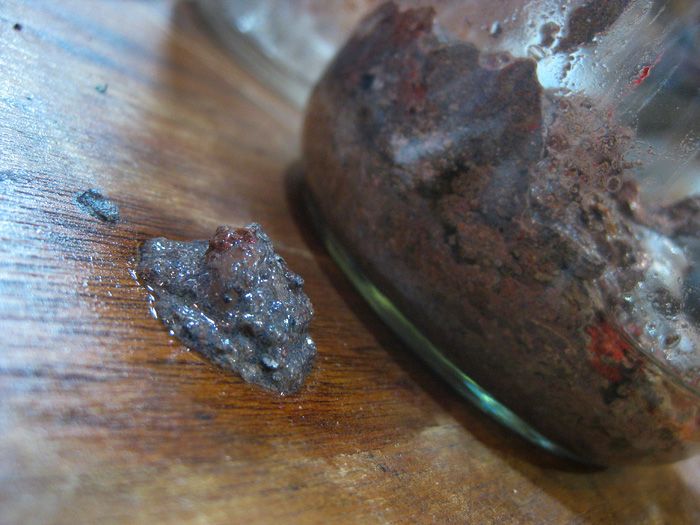
After completing painting #12 in the Apostasy series this week I cleaned out my solvent rinse cup which I’d realized had possibly reached an all-time record toxic sludge accumulation. Over the past 9 months of painting this series (and a few randoms) the usual 80/20 solvent/debris ratio had been reversed (no wonder my brushes weren’t getting too clean anymore?). And it had turned a weird gray color? Not sure what that’s about. Naturally, I had to document my little contribution to the degradation of ecosystems and immortalize by posting on the internet–life, circa 2012. Oil paint sludge: the excrement of art.
Read →
June 21, 2012
In The Studio 1
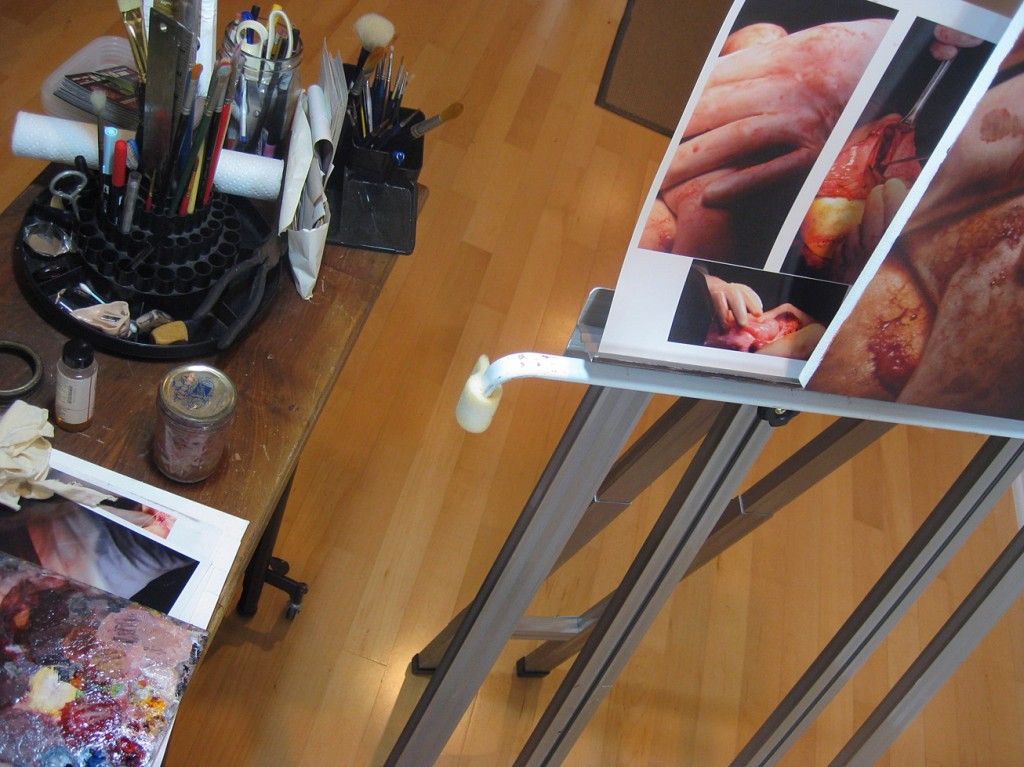
I had these studio pictures laying around, so I figured I’d post them. They’re from my recent series “The Apostasy” which is still on display for a very short time at Last Rites Gallery in NYC. See the blog archive for previous posts about the series, and view it now in its entirety by navigating through the “2012” category to your left. Thanks to the generous collectors who bought paintings! “Baptised” in progress, with reference, November 2011. “Baptised” palette madness. Painting the final image of the series, “Communion” at the Paradise Artist Retreat in New Mexico, February 2012.
Read →
June 12, 2012
Realism Techniques 5
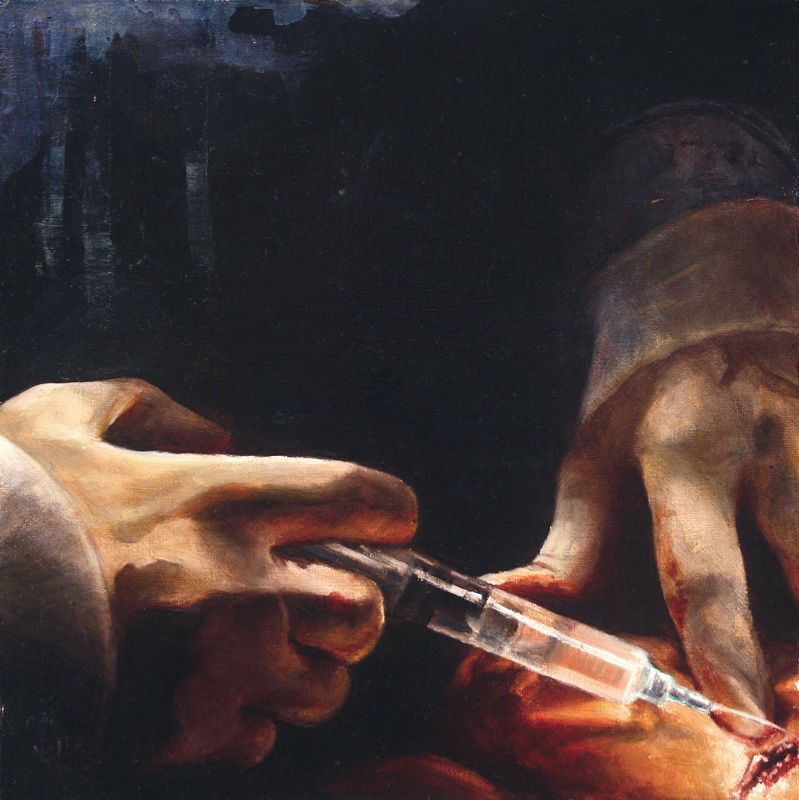
Just as a tiny version of a future full-size drawing is referred to as a thumbnail sketch, the term study is often used to refer to a smaller, quick, “warm-up” or practice version of a future painting. If memories of sitting in your school library reading textbooks in preparation for a final exam come to mind with the use of the term, you’ve got the right idea. Artists’ preliminary studies are exactly that: a chance to recap the ideas and memorize the information before embarking on the final challenge, in order to ensure success. It’s a professional artist’s studio practice dating back hundreds of years, becoming a necessity for many artists as they began to undertake works of monumental complexity and extreme precision. The practice of completing preliminary studies wasn’t something I undertook until I started painting larger dimensions a few years ago. I had always found that the time and work involved in painting at extremely small sizes didn’t warrant a practice run beforehand, as the potential mistakes to be made at that scale would themselves be smaller in scale–and able to be corrected in a reasonable amount of time. Essentially it seemed like I’d be completing the same work twice. "Anointing" (Study), oil on canvas board, 12 x 12in, 2011 But as I took the plunge into attempting larger scale paintings, I suddenly realized the larger scale problems that could occur, costing days or weeks of time, money in expensive materials, and frustrated energy backtracking and correcting. It was time to take up the age old tradition of completing a practice run to head off any potential problems before they occurred. At first it seemed like a hassle–an extra step preventing me from diving right into the joy of spreading those first layers of fresh paint on a new surface. But now that I’ve gotten into the habit, I really savor the opportunity to “prime the pump,” get familiar with the subject matter, acquaint myself with its nuances and palette, work quickly, intuitively and loosely…and most of all, make mistakes as I work out any ideas I may have. I’ve found that the painting process following these studies goes much more smoothly, resulting in works accomplished in less time with less hair-pulling moments of indecision or bewilderment. As I’ve written before, the degree of meticulous patience and strategizing that goes into the thin layer buildup of my paintings is crucial for their success. Thus, anything that allows for more opportunities to plan and prepare, such as completing one or more preliminary studies, in turn allows for more complexity and refinement of the final illusion, which is the ultimate goal. The studies you see here were completed in around 5 hours or less, and are actually way more refined than a preliminary version needs to be. They can potentially be completed in minutes, and can be incredibly sloppy. As long as you figure out what you need to do in the final version of the painting, the study has served its purpose. (Untitled Study for an upcoming painting) oil on canvas board, 12 x 12in, 2012
Read →